Help for Camera Suite (Linux/MacOS/Windows desktop version)
Camera Suite allows you to control action cameras such as GoPro Hero 2/3/3+/4 models over Wifi/WLAN. It supports full control over the camera, live preview, media browsing, script- and server based remote control, and changing of camera settings. The Linux, MacOS and Windows versions of Camera Suite have the same features and a similar user interface.
Connecting GoPro Hero 2, 3, and 3+ cameras
The following steps are necessary to connect GoPro Hero 2, 3, and 3+ cameras over Wifi:
- Enable Wifi on the GoPro camera and set it to "App" (or "phone+tablet" on some models) mode.
- Connect your Mac or Windows machine to the GoPro Wifi network. The default Wifi password if you have not previously changed it is "goprohero".
- Start the Camera Suite app and select the "GoPro Hero 2/3/3+" entry in the connection dialog.
- Press the "Connect to camera" button. A connection dialog appears which will immediately disappear when your GoPro is correctly connected.

Connecting GoPro Hero 4 cameras
GoPro Hero 4 cameras have introduced an additional one time pairing step which is required once for each device (and has to be redone if the GoPro is resetted):
- Turn on the GoPro Hero 4 camera and go to Settings → Wireless → GoPro App → New on the GoPro camera. A PIN code will be shown.
- Connect your Mac or Windows machine to the GoPro Wifi network (the SSID of the network looks like "GPxxxxx"). The default Wifi password if you have not previously changed it is "goprohero".
- Start the Camera Suite app and select the "Pair camera" button.
- Go to the "Pair" tab.
- Enter the 6 digit pairing code displayed on the GoPro camera.
- If you want to change the Wifi password then enter a SSID and password into the appropriate fields. Note: the SSID and password have to be each at least 8 characters long.
- Press the "Pair camera now" button.

After pairing, the camera can be connected with the following steps:
- Enable Wifi on the GoPro camera and set it to "App" mode.
- Connect your Mac or Windows machine to the GoPro Wifi network using the SSID and Wifi password entered during the pairing process.
- Start the Camera Suite app and select the "GoPro Hero 4" entry in the connection dialog.
- Press the "Connect to camera" button. A connection dialog appears which will immediately disappear when your GoPro is correctly connected.
General app usage
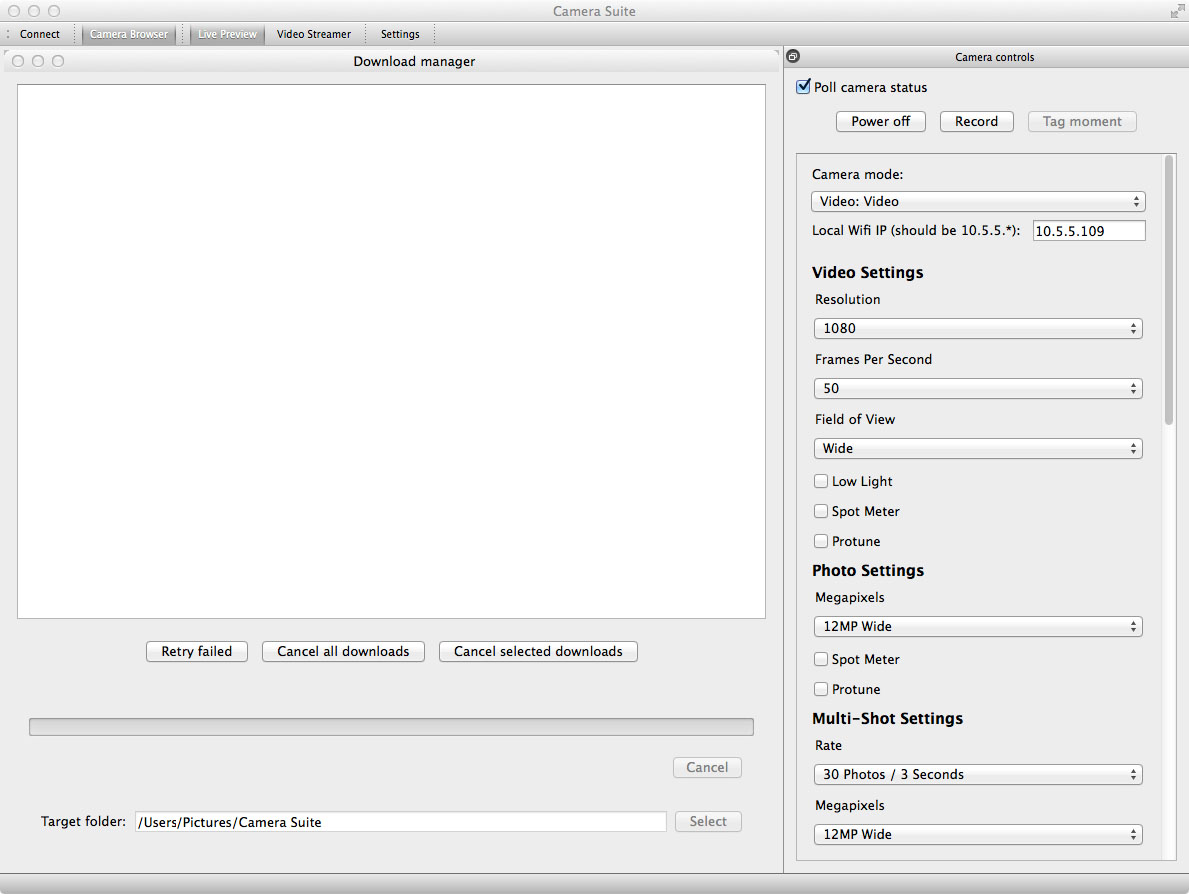
The main app screen consisting of the camera settings and the download manager is shown after connecting to a camera.
Functions
- The top bar ("Connect", "Camera browser", ...) opens main functions of the app.
- Poll camera status: If checked then the camera status is regulary checked. For long lasting operations (e.g. time-lapse) it is recommended to uncheck this option to save energy.
- Settings: Opens a dialog with general app settings.
General Settings
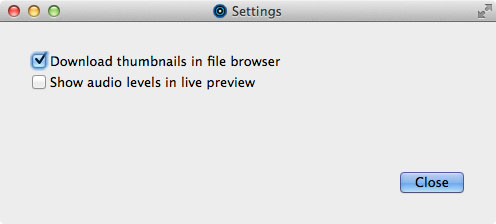
- Download thumbnails in file browser: If checked then thumbnails are downloaded for each media file. If not checked, then only media information (filename, etc.) are retrieved.
- Show audio levels in live preview: If checked then the audio levels (meter) of the left and right channel are shown. Generally it is recommended to disable this option because it slows down preview.
Media browsing and management
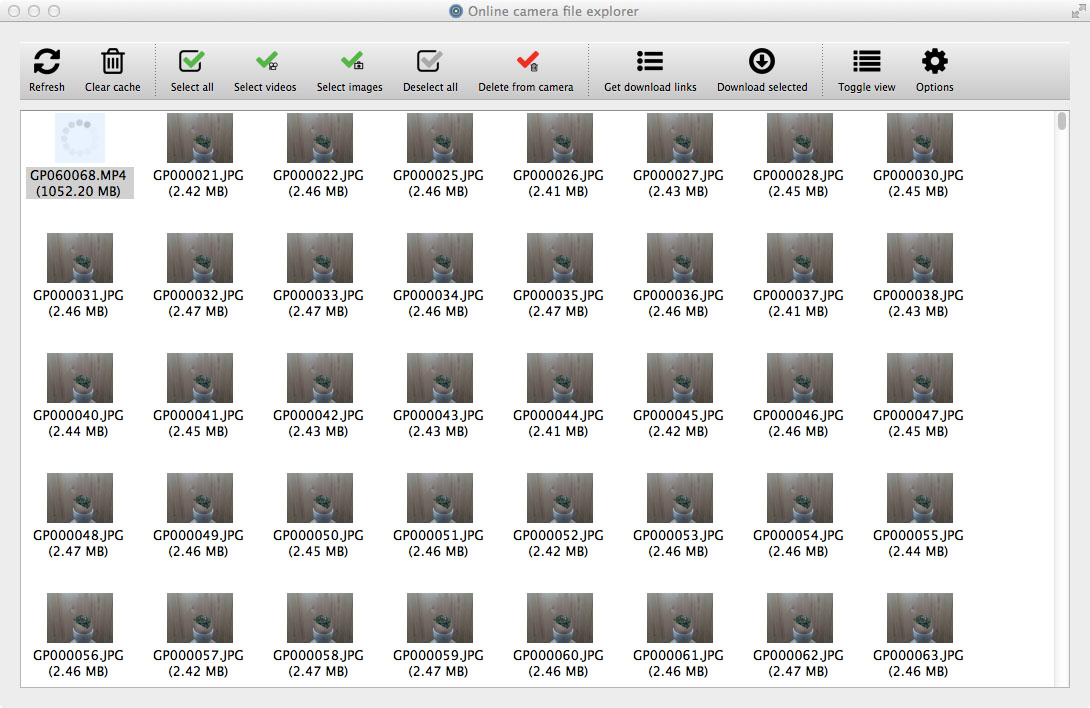
The media browser supports viewing, streaming, download, and deleting of media files from the camera.
Functions:
- Refresh: Reloads the list of media files from the camera.
- Clear cache: Clears the local cache of thumbnails.
- Select all/video/images and deselect: Selects and deselects items.
- Delete from camera: Deletes the selected files from the camera. Note: Some media types (such as time-lapse, burst, some video formats) cannot be deleted over Wifi on GoPro Hero cameras. This is a restriction of the current camera firmware.
- Get download links: Shows a list of download links for the selected files. These links can for instance be copied into another download manager app.
- Download selected: Adds the selected files to the internal download manager. As an alternative, files can be directly dragged into the download manager window using drag&drop.
- Toggle view: Switches between grid and list view.
- Options: Show camera specific options.
Hints: Double click on a thumbnail to open the full resolution version. Right click on a thumbnail to open a popup menu with more options.
GoPro Hero camera browsing options
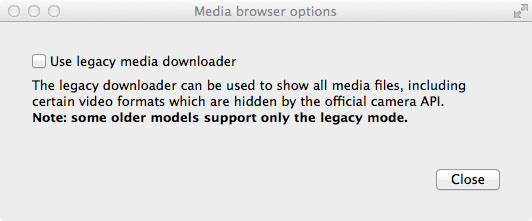
- Use legacy media downloader: The legacy media downloader supports downloading of all media files (it has not the limitations of the "normal" downloader which uses the official camera functions). The download is slower than the "normal" downloader.
Live preview and streaming server
The Camera Suite offers a built in preview which can be opened with "Live preview" button in the top menu bar.
If the preview does not start or an error message is shown then try the following:
- Make sure that the firewall is not blocking the camera.
- Restart the camera (e.g. remove both the USB cable and the battery).
- Close and re-open the live preview window.
- Close and re-open the Camera Suite app.
Streaming server
The streaming server converts live camera video and audio streams into an MPEGTS UDP stream which can be easily played back with many players (such as VLC, mPlayer, ffplay, ...).
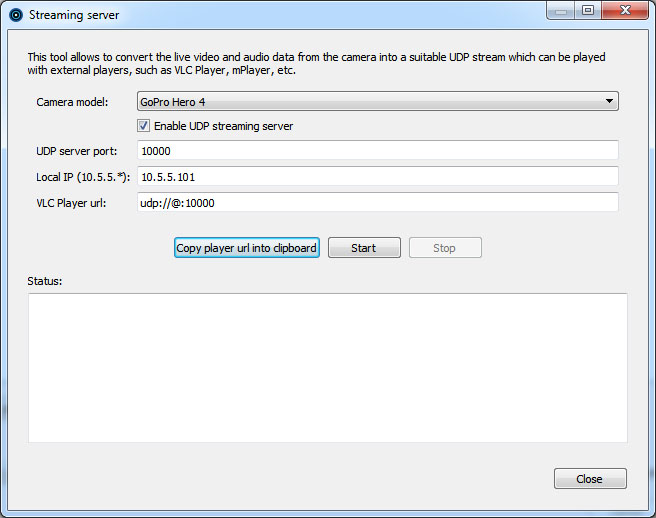
Options:
- Camera model: The camera model from which the data should be streamed. Note: GoPro Hero 3+ cameras work with both models "Hero 2/3" and "Hero 3+".
- Enable UDP streaming server: If checked then the video and audio stream is converted and sent by UDP. Unchecking this option is useful to convert the raw camera stream data on your own (for instance with ffmpeg).
- UDP server port: The port where the video and audio data is streamed to.
- Local IP: The local IP address of the Wifi interface. The IP is automatically detected but can be changed if the detection fails.
- VLC Player url: The address with which the stream can be opened in another video player. Note: on some players the "@" sign has to be replaced with "127.0.0.1" or "localhost".
- Copy player url into clipboard: Copies the player url into the clipboard.
- Start: Starts the streaming server.
- Stop: Stops the streaming server.
- Status: Shows status messages and errors.
Note: It is highly recommended to explicitely stop the streaming server before exiting the app.
Scripting and command server
The scripting tool and command server can be reached over the menu "Advanced" - "Script processor".
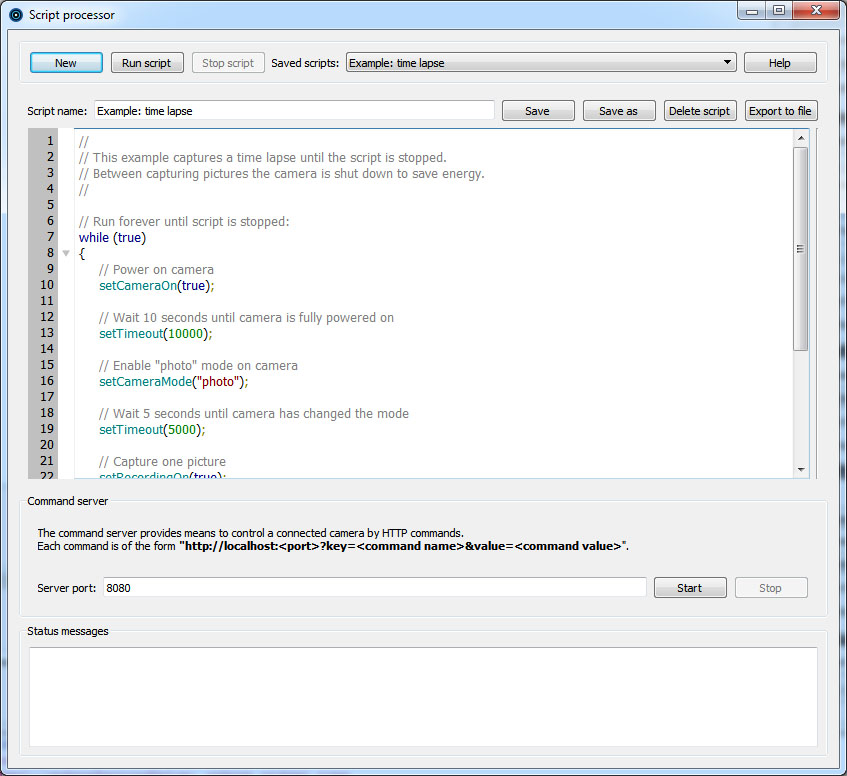
The scripting tool allows to control the camera using a Javascript based language.
The command server sets up an HTTP server which can receive commands by HTTP (for instance from a webbrowser) to control a camera.
- More details about the scripting language can be found here.
- More details about the command server commands can be found here.